Wednesday, April 30, 2014

Potato Spinach Leek Soup

     April brings spring. When you live in the South the temperatures are already rising. We've still had lingering cold nights and chilly mornings, but as the month ends they are fewer and farther between. I've been wanting to try out leeks for a long time and decided earlier in the week that soup was the way to start. This is perfect for those lingering cold nights and great for the terribly stormy nights we've been having lately.

Potato Spinach Leek Soup


Soak leeks in water to get all the grit gone!
Ingredients:

1 Tbsp. olive oil
3 Leeks, trimmed, tender parts only.
2 Cups fresh baby spinach
1 Clove garlic, minced.
3 Large russet potatoes, peeled and chopped.
32 Oz. chicken broth
1 Cup half-and-half
Salt to taste
Parmesan for garnish, optional
 
Directions:
 
1.  Heat oil in medium soup pot to med-high heat. Cook leeks, stirring often until soft. Reserve 1/4 cup cooked leeks for garnish. Add garlic to pot and cook for 2 minutes with leeks.
Add chicken broth and potatoes. Bring heat to high and cook covered for 10-15 minutes until potatoes are tender.


3. Add half-and-half , spinach, and salt to taste. Spinach will wilt. Working in batches, puree soup in blender. Garnish with reserved leeks and parmesan. Enjoy with crusty bread and a nice salad.


This is a great comfort food. Mr. P really liked it and he usually doesn't prefer any kind of potato soups. As for me, I'm a soup fan already so this was right up my alley. What are your favorite soups? I'm thinking of trying out cold soups this summer!
 

Thursday, January 30, 2014

Pink Lemonade Bundt Cake With a Citrus Honey Sauce

*Disclaimer*
This post has been sitting in the draft box since October. I caught a terrible cold that turned into a terrible cough. It took me a whole month to get completely better and the winter then decided to fly by. I'm a horrible blogger, but I will become a consistent, reliable blogger eventually!  *

Mr. P had family in town recently and we all got together at his grandparents. Conflicting work schedules usually hinder us from attending many family events or creates a mad dash for us to make it in time. Somehow the stars aligned just so and we were both off work on the same day. I used my time before hand to bake. I haven't made a sweet treat in a while and a family dinner is the perfect opportunity.

I'm beginning to have an overstock of boxed cake mixes that are taking up too much space. I prefer to make my desserts from scratch but sometimes it's easier to spruce up a box mix. I used a Pillsbury Pink Lemonade mix. I added some extra lemon flavor by adding a little lemon juice to the batter. If you would prefer to make your cake from scratch I would follow a lemon cake recipe and add pink coloring. You could also use a lemon flavored box mix and add the coloring if you can't find the specific Pink Lemonade mix. What makes this cake special is the homemade citrus honey sauce and candied lemon slices that garnish it. I chose this sauce over a traditional powdered sugar glaze because it's a larger quantity and the leftover sauce has multiple uses. It also adds the pop this box mix needs.


Pink Lemonade Bundt Cake with a Citrus Honey Sauce

Ingredients: for the cake

Pink Lemonade box cake mix
1/4 cup lemon juice
The next three Ingredients will vary depending on mix used. Follow specifics on the recipe you have chosen.
3 eggs
1/3 cup vegetable oil
1 1/3 cups water

Ingredients: for the sauce
1 cup orange juice
3/4 cup lemon juice
1/4 tsp. vanilla extract
5-6 tbsp. honey
2 small lemons sliced
White granulated sugar for candied lemon slices
Powdered sugar, enough for decorating.


Directions:

1. Pre-heat oven to 375° F. Spray bundt pan with non stick spray/bakers spray.
Follow cake mix instructions adding a quarter cup of lemon juice. Mix for two minutes until smooth. Pour batter evenly in bundt pan.

2.  Bake for 32-35 minutes, follow your box mix or cake recipe directions.

3.  While the cake is baking start the sauce. Combine all liquids into a sauce pan. Add lemon slices. Heat on medium heat to boil and simmer for 10-15 minutes. Until slightly thicker. Let cool while cake is baking.


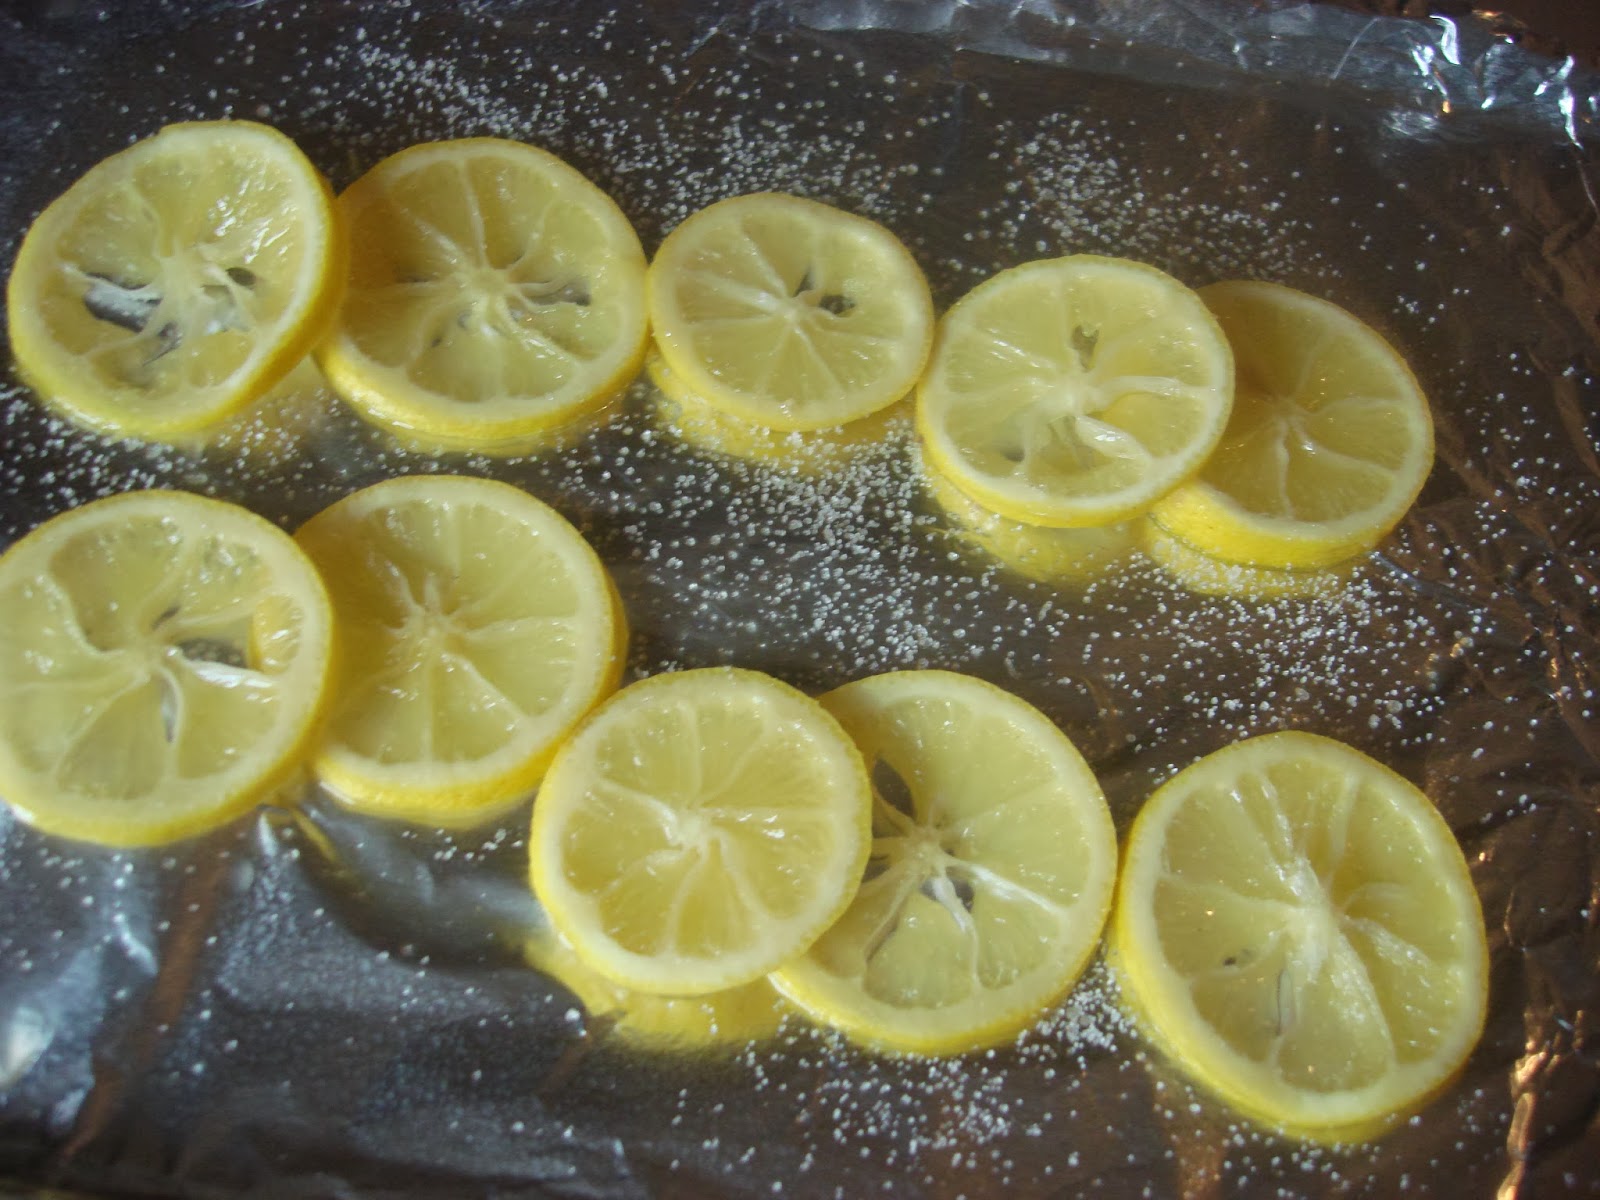
4.  Remove lemon slices onto a lined baking sheet. Sprinkle sugar over slices.
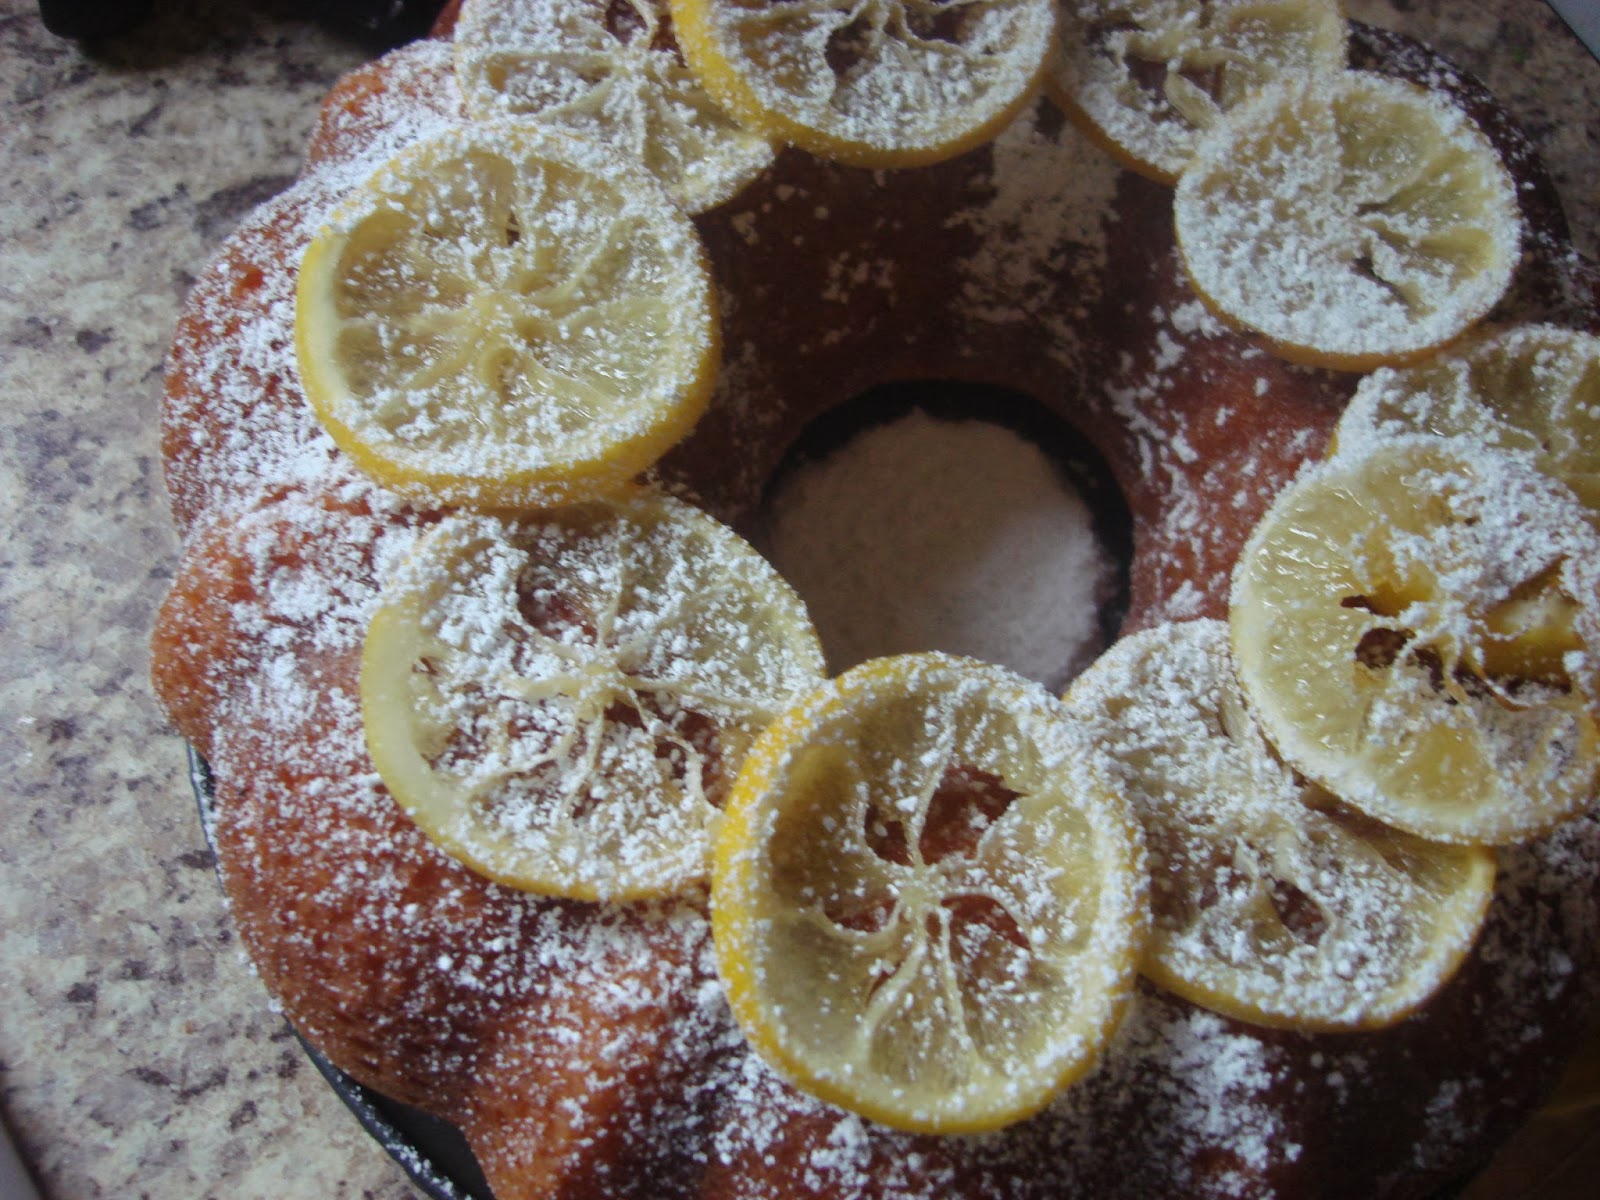
When cake is done and a toothpick inserted comes out clean allow to cool for ten minutes before removing to baking rack. Place lemon slices in oven and bake for ten minutes. Broil for two minutes. Let slices cool.


5.  Once cake is cool to touch place in a shallow pan or plate. Poke a couple of holes throughout with a skewer. Pour a generous amount of sauce on the bundt cake. Leaving about a cup leftover.
Let cake absorb sauce and sit for about half an hour.
Decorate with the candied lemon slices and powdered sugar.


You can store the leftover sauce in the fridge for about a week or so. It will become more syrupy with time.
You could throw in some orange or lemon slices in a tupperware and let soak for two days. Japanese style citrus dessert.
or
Add it to your sweet iced tea!

Thursday, October 3, 2013

Navarre Beach Sand Sculpting Festival

Happy Thursday everyone! I hope your week has been going well. Today is my last day off of the week, so while you are probably slaving away and getting ready for your weekend,  I'm relaxing. I work every weekend but was able to take a peek at The Navarre Beach Sand Sculpting Festival this past Saturday. For the past 3 years I have worked at the restaurant that provides the lunches for the sand sculpture artists. So every year I hear about this festival but something has always prevented me from attending. This time I was able to scoot across the street and see what it was all about. Finally using the perk of working on the island.

The judging took place on Sunday so the sculptures weren't completed, but part of the fun is watching the artist work. Here are a few of the pictures I got to snap. The texture and detail is quite amazing. Click here to see the official website and information about the artists or here for pictures of the completed sculptures.

The HUGE castle that displayed all the sponsors.

One of my favorites. It won first place! By: Meli Beauregard
This one was called Storm. By: Fred Mallett
Very tranquil. By: Morgan Rudluff
People's Choice! By: John Woodworth

There were vendors with Pina Coladas and beach artwork (naturally). The air smelled of salt water and funnel cakes. I picked up a souvenir from the Navarre Beach Marine Science Station booth. I'll be rocking my new shirt and have the magnet on my car. I'm happy to support them! It's great to have children educated about our remarkable beach.


I wasn't able to stay long but enjoyed finally being able to see the sculptures! Since I went after work I was alone and I'm awkward in social gatherings. It was a hit and run kind of deal. What kind of festivals happen in your town? Do you ever attend them? Many around here are more family and child oriented so I tend to pass on those. They won't let me in the bouncy houses.

Thursday, September 26, 2013

Summer Farewell, Fall Remix

I'm back. I swear! After taking all of spring and summer to reevaluate the direction of this blog, I have come to the conclusion that I boxed myself into two categories. I love trying new recipes and crafts but real life is much more hectic and spontaneous than a neatly thought out tutorial. I still do plenty of  recipes and projects, but I want this to be more than just a tutorial/how-to blog.

I want to incorporate more of my personality and the other things I am interested in and do; like thrifting, style, product reviews, book reviews, local events, new and updated Food & Hearts by J, and a new series replacing the HCP meeting series will feature more than just Pinterest findings. Expanding will also allow me to post at least weekly given the variety.

From the start I wanted Domesticult to be a chronicle of my journey into adulthood. I think encompassing more about my life will make me feel that I am achieving that goal. The past year alone has found me cooking and maintaining my house more efficiently than before, but life is about more than housework.

I did keep myself busy with a few things while I was absent from here. Here's a little of what I did.


Starting from top, left to right: 1. The anniversary surprise for Andrew this year. A whole concession stand, movie montage of our years together, a blanket fort and of course a romantic comedy was featured. 2. We attended his best friends wedding in March. It was a cold and beautiful beach wedding! Mr. P made a wonderful Best Man. 3. Adventure Time coasters I painted for my living room. 4. One of my art journal entries. Cats on Mars! 5. On my first meeting with the lovely Ms. Z we made banana muffins with a peanut butter brown sugar frosting. I made a new friend and Ms. Z also blogs! 6. The "Dragon Pig" cake I made for J's birthday this year. It's two of her favorite beasts! haha

You're probably thinking, "That's it? That's all you did for months?!" But, I assure you there was more but it wasn't blog worthy material. I've lived a pretty boring life for most of the summer months. I have deep cleaned my home in anticipation of fall. It's also the end of September and I figured it would be the perfect time to bust out the Halloween decorations.

Hello Fall. Nice to see you again.

There's going to be plenty going on this October. A new series will be introduced, J and I will be attending Gallery Night, Halloween parties and more!  Here's a few of my festive decorations to prepare me for the new season ahead. What are your plans for this October?


Wednesday, February 20, 2013

February Fail.


Everyone is well aware that Pinterest begins to give you gigantic illusions at to what you are actually capable of accomplishing. When your friends try some out and share the results is usually when you will decide to ever try it yourself. J made this cauliflower crust/cheese stick recipe that's been floating around on there for a while. She did hers in the cheesy "bread" way. I had thought the texture was odd at first but after you eat one  you can't stop! I gobbled them up at her house. She said she made them quite often in substitute of a bread snack. 

I decided to try it out myself and make the pizza version. I used the crust recipe from Fat Girl Trapped in a Skinny Body. I went with a little white Alfredo sauce, red onion, and mozzarella cheese as my toppings.


 I did not have parchment paper, however, when I made them. I believe this was my main problem as well as having them a little too thick. They stuck on the pan terribly! I eventually had to just scrape it off in chunks on my plate. It still tasted delicious but did not turn out pretty. J definitely had this recipe down! I'll find out her secret...

Thursday, January 17, 2013

New Year And Carbs

I ended 2012 poorly. It's been ages since I've updated. It seems like I've apologized about my long bouts of neglect more than actual blogging. It was my first year into it and I'm still learning. My lack of organization and time management is also a force to be reckoned with. I just want to express my enthusiasm for the new year and new beginnings!

This blog started with the purpose of chronicling my journey of making an organized (and fun!) adult home and life. I may have slacked off on the blog, but I can say that I cook way more often, developed better house chore habits, and have continued creative projects.


I decided to begin with two bread recipes. I realized I've never made any type of banana bread or "breakfast" bread variety. J came over one evening and we gobbled them up. These breads are comforting and delicious. A perfect start.


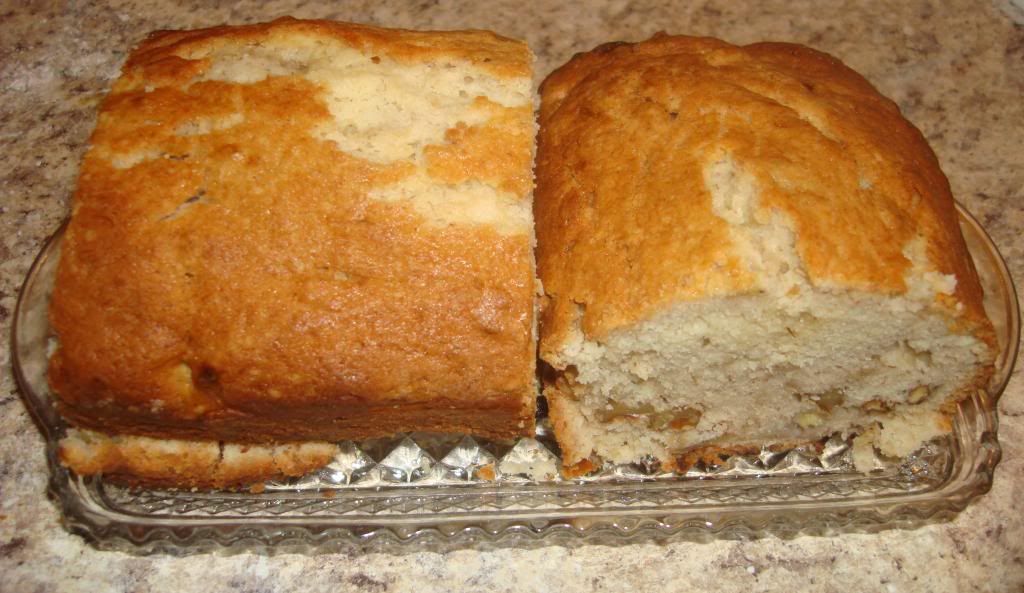
Cream Cheese Banana Bread

 
Recipe @ fakeginger
 
 
I followed the recipe exactly. It turned out wonderful. Mr. P decided this one was his favorite. Cream cheese is always Mr. P's favorite. My banana's were perfect for this recipe. They were dark on the outside but perfectly soft for baking. I was glad I just happened to have walnuts in the pantry!


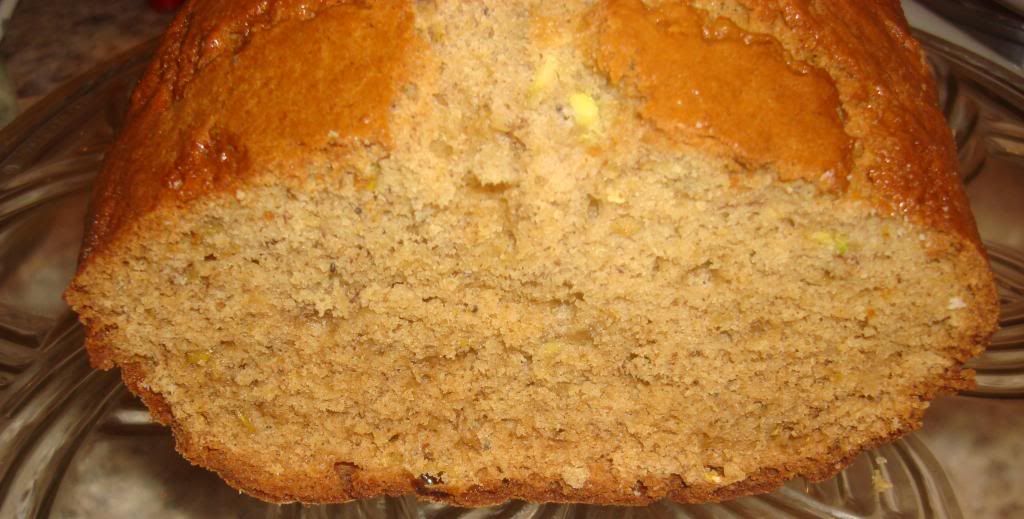
Banana Zucchini Bread


I adapted my recipe from Cinnamon Spice & Everything Nice
 
 
Ingredients:
 
1/2 C mashed ripe banana
1 C shredded zucchini
1/3 cup yogurt
5 Tbs butter, melted
2 eggs
1/2 C granulated sugar
1/2 C light brown sugar
2 C all-purpose flour
1/4 C toasted wheat germ
3/4 tsp baking soda
1/2 tsp salt
1 1/2 tsp cinnamon
1/2 tsp ginger
1 tsp vanilla extract
 
Directions:
 
1. Pre heat oven to 350F. Spray a 9 x 5 loaf pan with non stick spray.
 
2. In separate bowl, sift flour, wheat germ, baking soda, salt and spices together. ( I always do this while I'm preheating. Makes the whole process faster.)
 
3. With mixer, combine banana, zucchini, yogurt, butter, and eggs. Beat until just combined. Add sugars and blend on medium.
 
4. Add dry ingredients to wet. Beat until just combined.
 
5. Bake at 350F for an hour to 65 minutes, until toothpick inserted comes out clean. Cool in pan for 10 minutes and then remove to rack to cool completely. Enjoy!
 
You could add a frosting if you would like. I enjoyed mine warm and with a little butter. I got a lot of compliments from coworkers that hate zucchini and loved this bread!


Monday, September 10, 2012

Happy Birthday to Me.

My 25th birthday was on Thursday the 6th, but I had been celebrating since last Monday it seemed! Mr. P has a brother whose birthday is 3 days before mine! It was quite a busy week!

I'd like to share some pictures of my Sushi Birthday Night with the girls. We did some easy cupcake decorating and demolished sushi from Sakura.


I thought using the rice crisp cereal over the cupcake made it look like the puffed rice sushi variety. It also tasted awesome and gave the lemon cupcakes some crunch. We used "pull n' peel" twizzlers and gummy worms for the decorations on top.

I also put together a party favor bag. I planned this party at the very last minute and didn't get to diy a lot of the things I would have liked. I did keep up with the "kawaii" kind of theme and had frog shaped plates, a cupcake "cupcake" holder, paint-dipped chopsticks, and a cute notepad that opened into an apple shape. I knew that was all too much to fit into a take-out style box.

 I found out about "Furoshiki" which is a Japanese wrapping cloth. It's super environmentally friendly. I found an easy guide posted on "Keeping the Christmas Spirit Alive,365"  I have extra material lying around and cut some squares out. There are many different styles to try. I went with the one that looked like a shopping bag. I just twisted the "handles" together and secured with the chopsticks!


Thursday, August 30, 2012

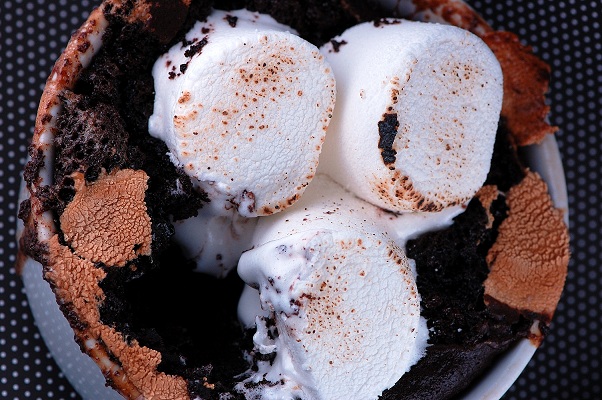
It's National Toasted Marshmallow Day!

I finally found a few sites online that list those off the wall holidays. Brownielocks and Holiday Insights. Some just make me laugh, like Wonderful Weirdos Day coming up on Sept. 9th!

In observance of toasty marshmallow day I thought it would be nice to share some yummy recipes I found.


and the always classic S'mores Bar


I'm afraid to say that a lot of my baking resources have ran dangerously low. I live in the Florida panhandle and all this week we were expecting the storm. Wasn't a good time to go car shopping even after waiting all this time for the insurance payment from the accident! Needless to say, I do not like to keep asking people to take me to the store. So, instead of making one of these awesome goodies listed, I improvised.
 

 Microwave Milano S'mores

There are really two ways you could go about making these. I chose the route that contained more cookies and sweetness. Your other option includes zapping the Milano cookies for literally 5 seconds, or enough for you to slide the cookies apart. Then mush a marshmallow on one side (you already got the chocolate!) and microwave for about 15-20 seconds. Just keep an eye on it! Add the top...ta da! Instant s'mores. Or double the goods like I did.
 
 
I used some chocolate baking chips instead of a candy bar.
 
I split the marshmallows in half and placed on a cookie.
 Topped with a few chips.
 
Melty Goodness!
 
I gobbled these up!


A really quick and easy indulgent snack! It's been a long week everyone! To all my fellow gulf coast residents I'm glad FL missed the worst of it and hope all others are well! We had cancelled this month's HC Pinners meeting because it was scheduled the night the storm was hitting. We will re-schedule. You'll most likely see 2 meetings featured for September!
 
My birthday is also coming up next week. I'm throwing a sushi party at home for close friends. I have some nifty ideas and will gladly show off my kawaii party! Follow me on Pinterest, you can check out my board for it.
 
I'm getting out of my end of summer rut and ready for festivities and fall!


Thursday, August 23, 2012

Halloween Mash Up

Here are a few Halloween ideas that I plan on trying. A great mash up of some cute diy projects I found on Pinterest and blogs. Enjoy!


Wreaths


Black Tulle Wreath from Something To Do

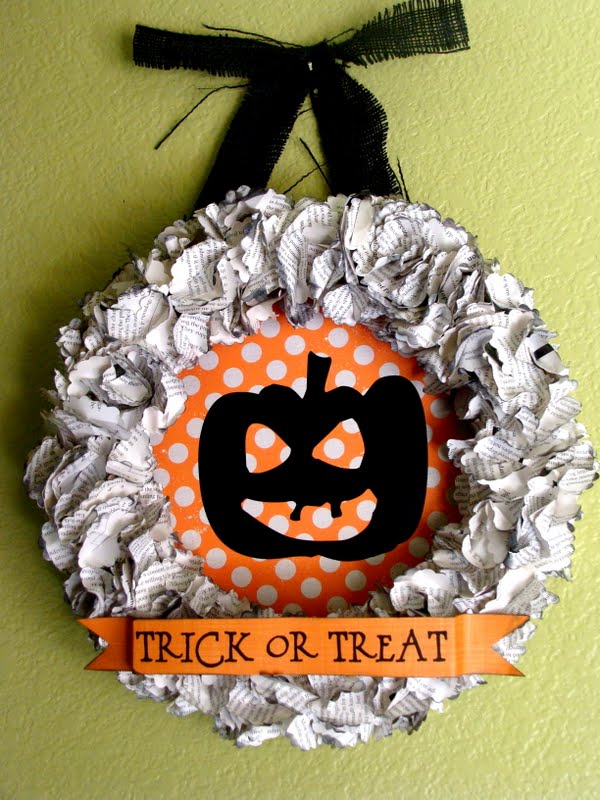
I also really like adding a background to it.
Lil' Luna added a background on their Trick or Treat wreath. I like using a silhouette in the center. Maybe actually cut it out like a jack-o-lantern? Either way, I must make a wreath in the beginning of October to start off the festivities!

Centerpiece

I've scoured the Internet for ideas. Mine is going to be some kind of mad scientist like mix of these great centerpieces.

The House of Smiths does a cute creepy candy display. I really want to incorporate Halloween candy to munch on!

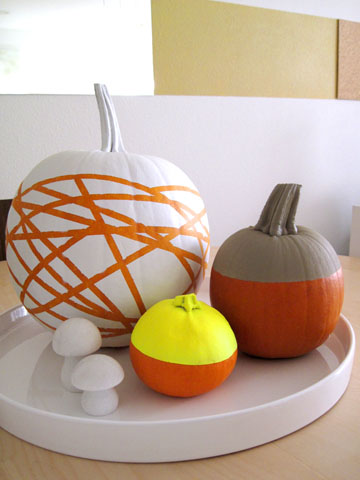
These painted pumpkins from Happy Mundane are awesomely non traditional but festive. Carved pumpkins are a "tradition" Mr. P and I started last year and we'll definitely have some glowing outside. I'd like painted ones to put on the table. I'm afraid the kitties will destroy and/or eat any carved pumpkins in the house.


Wine Bottle Decor

I have a few wine bottles cluttering up my kitchen window. I think these are just adorable. The vampire and ghosts will look cute in the kitchen! This particular one was found on Woman's Day.

I also found another style of ghost bottle that was made with the frost spray paint. I like that idea to use as a base with these cute faces!

Candles

Halloween must include some kind of candle illumination. While searching for Halloween decor in general I have come across a few ideas involving tights and pantyhose being cut and used to wrap around pumpkins and jars alike. Stashed in my diy board on Pinterest is this idea of spray painting over lace to leave the design.

Look how pretty! From Roadkill Rescue

I think combining the pantyhose trick over a candle holder and spray painting it would be awesome. I got the inspiration from these votive holders from Shelterness.


I know I will be able to find some interesting patterned tights at the store!
 

Garland

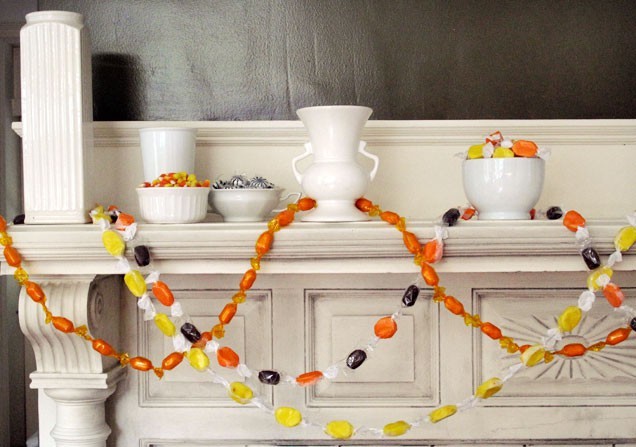
 I love garland. I think it makes anything instantly festive. There's so many kinds you can buy. I always end up getting the cheap-o foil and wire variety for outdoors. I want to make my own for inside. These two scream cute and Halloween.
 
Let's be honest, any garland making is going to be time consuming. Tying or gluing tiny objects onto string doesn't sound as appealing as it ends up looking! Buying a bag of the cheap variety candy and still achieving the same results sounds like a plan to me! iVillage inspired this one. Simply staple them together!
 
 
The pom garland is adorable. This one requires more effort than stapling, but Paper Source gives you a wonderful PDF tutorial that is super easy to follow. I can't wait to try this one out! Also, save the idea for other holidays and events!
 
 
What are you planning for Halloween?


Wednesday, August 22, 2012

Homemade Monkey Bread

It's been a rough couple of  weeks. I haven't had time to make any sweet treats lately, and every time that happens I start to Jones for my hands to be a bakin'.

 I decided to make something warm and yummy because it's been raining buckets down here. I'm already preparing myself for a "fall mindset"! All the recipes I found were using canned biscuit dough. I really wanted to making something from scratch, so just decided to make my own biscuit dough and then turn it into Monkey Bread.


Homemade Monkey Bread


Ingredients for the dough:

  • 2 1/2 cups all-purpose flour
  • 2 1/2 tsp baking powder
  • 1 Tbs white granulated sugar
  • 1/2 cup cold un-salted butter, cut into pieces
  • 3/4 cup milk
  • 1 large egg, lightly beaten
Directions:

     1.  In a large mixing bowl, whisk together first three ingredients. (Dry ingredients)


     2.  Cut the butter into the flour mix using a pastry blender. Cut to where flour resembles course crumbs.


     3.  Add the milk and egg to mixture. Stir until just combined. Dough should be sticky and moist, also lumpy.
     4.  Place dough mixture on a lightly floured surface. Knead dough till combined and smooth. Be careful to NOT over knead either!


     5.  I was able to cut out 14 biscuits with my dough. I used a wine glass as my cookie cutter. When done making your 14 biscuits cut them into quarters.
    
Ingredients for Monkey Bread:

  • Biscuit portions
  • 1/4 cup and 2 Tbs white granulated sugar
  • 1/2 tsp cinnamon
  • About a cup of packed brown sugar 
  • About 3/4 cup melted butter
Note** I used the Pillsbury recipe for a rough basis of assembly for the monkey bread. With their canned biscuits they had 16, my homemade biscuits made about 14. When I coated the biscuits, I didn't account for the extra sugar/cin topping. This, I believe is the culprit for the outcome. In the recipe written I accounted for the ratio drop. So, when I make this again, it shouldn't fall apart. But, it was still delicious. I don't care what it looks like if I'm not making it for anyone special! Bake fail?!

Directions:

      1.  Pre-heat oven to 350F. Grease a fluted/bundt pan. In plastic Ziploc bag, combine granulated white sugar and cinnamon. Place biscuit quarters into bag and shake! Coat dough pieces.


     2.  Arrange dough pieces into pan. In a separate bowl, combine brown sugar and melted butter. Pour over dough in pan.

When I looked at this picture I knew there was too much sugar coating!
     3.  Bake for 28-30 minutes. Golden brown and no longer doughy. Cool for 10 minutes and invert. You're then supposed to be able to "pull it apart." Mine kind of fell apart. But, it was my first time ever actually eating Monkey Bread I think. I knew what it was, but have no memories of ever actually eating it. Was still a success in my eyes! And, using my altered lowered ratio, I should have a better outcome next time!

It looked so perfect in the pan!

Fell out and the rest I just pulled all apart anyway! Grr....


I know I could have just used the canned biscuits and probably not of had any problem. But, I just love making homemade biscuits! This tasted great with my Macadamia Nut Coffee. Yum yum!


Monday, August 13, 2012

Dinner Duo


Mama Bear and I made this together the other night. We haven't got together in a little while and decided to make dinner at my place. We did a quick Pinterest search for something easy and this is what we found!


Ours differs from the original because we didn't prepare our chicken in a crock pot in advance. Also, we omitted the green peppers. We also used colby jack cheese, our selection at the grocery store was slim not sure if that's "Longhorn" cheese. 

Ingredients:
  • 1 onion, chopped
  • 1 teaspoon minced garlic
  • 2 TB butter
  • 3 cups shredded cooked chicken (we pan cooked very thin natural chicken breasts)
  • 1 12 oz pkg thin spaghetti broken in half, cooked according to directions
  • 1 can cream of mushroom soup (10.75 oz)
  • 1/2 cup butter melted
  • 1/4 cup flour
  • 2 cups milk
  • 8 oz colby cheese jack, grated
  • 1-2 TB olive oil
Directions:

  1. Cook your chicken breast in skillet with olive oil. We used very thin breast so this shouldn't take more than 15-20 minutes for 3 cups worth.
  2. Saute onion on med/high heat in 2Tbs butter in saucepan. Add garlic when onion is beginning to soften. Meanwhile, have water boiling for noodles. We broke our noodles in half. Boil spaghetti based on box instructions.

     3.  Mix noodles, mushroom soup, and chicken together in onion/garlic saucepan. I folded it all together to be evenly coated.


     4.  In a seperate saucepan, combine the melted butter and flour over med. heat. Similar to a roux, creating the thickening agent for the sauce.
     5.  Slowly add milk. Stir with a wire whisk until mixture thickens. Stir constantly, don't want it to clump!

     6.  Stir in grated cheese and pour over noodle mixture.


We had made some awesome spinach dip dinner rolls. It was also super easy and went well with the meal. I'll eat anything loaded with carbs. Bread being my favorite. Then pasta.


For this recipe we used drained canned spinach for the filling and switched up the mini part. We made ours in a regular size muffin pan. Also, I already had some canned biscuits, so we used that instead of french bread dough. And it turned out wonderfully yummy. Our variation is probably the less healthy option.

Ingredients:

  • 1 can of biscuits, pastry dough, french bread your choice
  • 2 TB olive oil
  • 2 cups of drained canned spinach
  • 1 clove fresh minced garlic
  • 3 oz. softened cream cheese
  • 2 TB parm. cheese
  • Dash of chile pepper, galic salt, salt and pepper
  • 1/3 cup shredded ched/moz mix or just moz!
Directions:

     1.  Pre-heat oven to 350F. We made 8 biscuits for our dip bowls, but I'd follow the original recipe for smaller "party" portions! So, flatten dough into a rounds and press onto bottom and up sides of muffin cups.
 
      2.  Heat oil in skillet. Saute garlic. Add drained canned spinach and stir.
      3.  Mix all ingredients, except the shredded cheese, together in a large mixing bowl. Combine well.

      4.  Scoop into bread bowls. Sprinkle shredded cheese on top. Bake 15-17 minutes until edges are browned. Let cool and enjoy.


I have added these recieps to my official "go to" easy dinner list. It really took no time at all. A really good comfort food.